
The Problem
My partner has had a pair of GHD SS2 hair straighteners for a fair few years now….

Just recently we noticed every time she used them the red light on it flickered more than normal and the sunlight alarm clock we have started to flash….
And then they started to cool down intermittently….
So …bin or repair…..

I am of the old school….
It can be looked at….
Unless you get ‘that look’ which means it is time to replace it…..
This time there wasn’t ‘that look’….
So they got whipped away into my workroom…
Are There Spares Available
And onto the internet to find out what spares are available…..
There are still most parts available which surprised me…
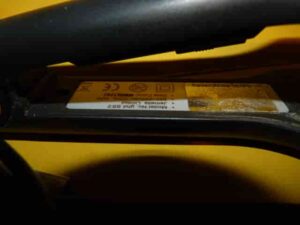
You need to make sure you get parts for your model…
And the one i am working on has the model number opposite the main switch…
The later cable will not fit, so make sure if you have the SS2 model you get the right cable kit…
Testing It
I have repaired the rear rotary connector a few years ago and suspected that it had gone again….
Wiggling it ( technical term) there was a bit of movement up and down…
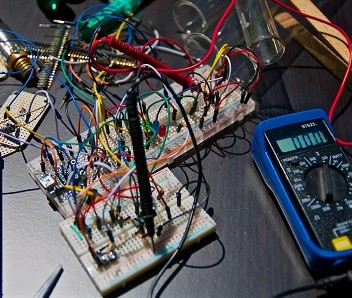
Using an old trick from years past and connecting a multimeter between the live pin and neutral pin on the plug and switching the unit on…
No i don’t expect it to be powered by the multimeter…
But in the past you had a connection between the live and neutral through the transformer…
So this way you could check that the fuse was ok, the switch and the mains lead and connector…
With modern electronics the live and neutral are not directly connected and most go through diodes or other devices….
So no joy there then….
Or the fuse blown or switch not working…
So just for the ease of it , i checked the fuse…
Resistance test showed low resistance, so ok….
Next in line is the mains cable…
Running the cable under the first finger, over the second and under the third finger …
Allows you to run the cable through your fingers looking for any ripples in the cable that shouldn’t be there…
Watching these being used and the cable thrown around, i am amazed they last….
Doing this about halfway up i felt a bit of rippling and towards the straightener connector there was another area…
So i need to get access to test the resistance of the lead…
Rear cover Removal
On the SS2 version if you hold the plates together ( what i did was to use a bit of masking tape on the plate ends t ohold them shut, or you could use a rubber band) you can just get a phillips no.1 screwdriver onto the two screws holding the cover down at the back of the straighteners…
You will also need to carefully remove the o-ring to release the cover….
As you can see mine didn’t survive and will need a replacement…
Making sure you don’t drop the fitted cable clamp, as this forms part of the rotary joint…
Remove the cover by lifting about 70 degrees and pulling backwards….


The little circuit board which allows the cable to pass through and make the rotary connection should be visible, if not popped out of its mount…
The thing to take note of here is the fact that the middle pin should be passing through the wipers on the other side…
Mine wasn’t so i either fitted it incorrectly last time or over time they can move enough to pop out from there…


Cable test
Pulling the cable from the connector allows you to test the cable….
Using a multimeter set to ohms or the continuity test ( if you want to make a noise), connect one lead to the plug live and find the corresponding part of the connector that is connected, it should be the pin…
Verify that you have about 0 ohms or the buzzer is going and move the cable around, especially over any areas you felt were not smooth…


If you keep continuity constantly then move onto the neutral pin and the other part of the connector…
Again verify that there is continuity and waggle ( technical term) the cable to see if there are any breaks….
With my cable, where the overmoulding is at the end which fits into the straighteners, when i bent it the resistance went to open…
And where i felt it about halfway down the cable, again when i bent it ( waggled it) it went open…
So this time it is the cable….
Refitting
Looking at the connector board, i managed to bend the wipers for the pin so that when inserting the cable it went through the middle…
I have access to some grease for sliding connections, this extends the life, not everyone has this , but if you have contact cleaner and lubricant, now is the time to spray the connector….
I also added a little, and i mean a little , silicon grease to the plastic part that is held in the clamp and rotates…
The last thing you want is whoever uses them to complain that they are all greasy…
The silicon grease does not attack plastic and does not ‘go off’ leaving that nasty ‘old grease smell’…
Now the other problem that happened was the o-ring broke…
This part is necessary as it puts pressure on the back of the clamp and allows the rotary joint to rotate…
I have two o-ring kits a metric one and imperial one and found one that was slightly smaller…
Make sure you put this onto the cable before reassembling ..or you will be stripping it down again….
Making sure that the pin passes through the middle of the two wipers on the other side of the connector board, seat the cable into its connector…


Do i feel like i am cheating not replacing the connector board, in a way yes, but if it doesn’t need replacing then keep it for another day…
If after the repair the problem still exists then it is worth replacing the connector board…
Fit the upper hounsing, making sure that the cable clamp is still in place….
Screw in the two screws…
And refit the o-ring in the groove…
Testing
Now try the wiggle on the cable and see if it is loose within the housing…
With mine the slack had gone….
Make sure there is no surplus grease on the rear of the casing….
Plug in and switch on…
Wait for the light to flicker as it should….
And waggle the cable to make sure it doesn’t cut out….
The GHD straighteners have lived to see another day….
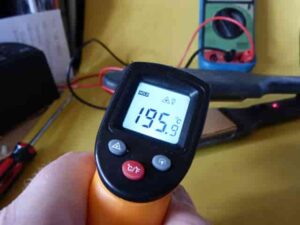
Switch off , allow to cool and place back where they are going to be used….
This repair is a relatively easy one…
Replacing the connector board
If the connector board requires replacement you will need to remove the hinge covers (just pop off), undo the screw which passes through the hinge (screwdriver either side), remove the top cover three screws and then unscrew the wire ends, feed the cables through and replace the connector board…
Reverse the above for refitting…
I hope with the images this is enough for you to have a go at keeping your GHD straighteners alive for a bit longer….
Final thoughts
They are a good pair and i am really surprised that there are still hair straightener spare parts around for them, they either must have overmade or changed the design quicker that they thought they would…
But i am not complaining….
Let me know if you have any problems or found this useful….
Or have another way of doing it….
Thanks for reading
Phil
Sign up to be kept up todate.
- what should i do to make money online - September 7, 2022
- Scirocco mk2 k-jetronic fuel system issues - April 21, 2022
- How to fix GHD hair straighteners : SS2 mains connector repair - December 7, 2021